On Sunday, I got to take a cider-making course with Chad and Kevin from
Shovel & Fork. Lucky me! If you are in or near Edmonton, you need to check them out - they do all kinds of fantastic skill-sharing courses, from kitchen gardening to butchery. With their permission, I'm sharing a few photos from the course. Naturally, for the complete details, you really ought to sign up the next time this is offered.
 |
| We started the rainy morning with a quick chat about fruit choice, then some of us picked apples from Kevin's tree, while the rest worked at the fruit crushing station and cut the larger apples. Those are adapted garburators that we're using to crush the fruit. You can also go old school and use a 4x4 and a bucket. Don't used a steam extraction juicer, which cooks all the great flavours out of the juice. |
 |
| Crabapple puree (or 'pomace' as the pros called it). The fruit is pulverised seeds, stems, and all. |
 |
| A mix of crabapple and eating apple. |
 |
| The pears we were using. Kevin said these were picked a couple of weeks previous. They were still very firm and tasted quite dry. |
 |
| The apples we picked from Kevin's tree, which were sweet and juicy - perfect for eating out of hand but produce a bland cider if used on their own. |
 |
| The crabapples. Crabapples are readily available to be rescued from yards all over the city and are ideally suited to cider-making. |
 |
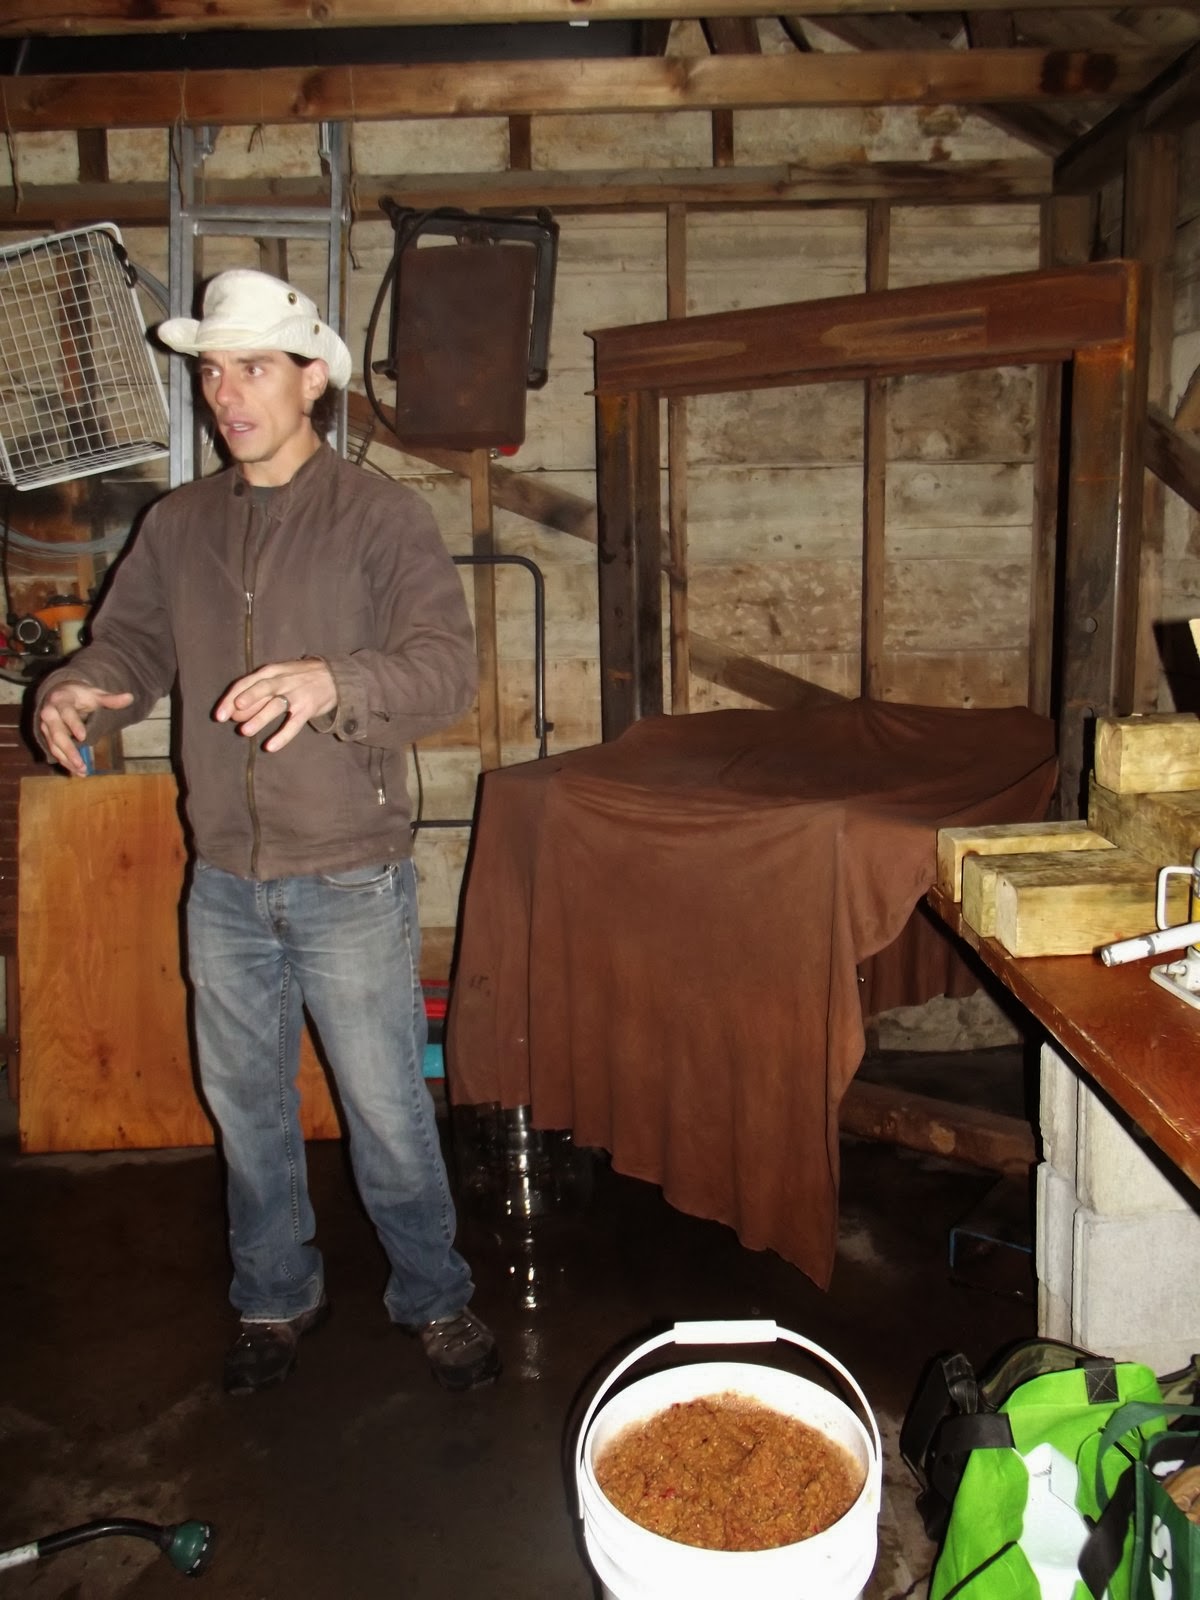
| Chad is explaining the entire cider-making process end-to-end for us. |
 |
| Chad explaining the rack press. Kevin's press is a bit over-engineered for most home cider-makers. There's an enormous oak tray under that cloth. |
 |
| Pouring the pomace onto the press. |
 |
| Covering the pomace with cloth. This part is finicky because it needs to be centred. |
 |
| The top of the rack press needs to be level, and there needs to be room all around for the juice to flow out. After this a stack of wood pieces and a jack are used to apply pressure evenly to the pomace to press out all the juice. |
 |
| The juice from our first press. |
 |
| Kevin explaining the bucket press. Directions for making this are at kevinkossowan.com |
 |
| While the pomace was being pressed, we had lunch, a cider tasting, and discussion of how to achieve different flavours. Growers is like drinking candy, and not in a good way, but made a fun point of comparison. Several more commercially available ciders were discussed. |
 |
| We also got to taste one Kevin made. Kevin prefers to let his ciders ferment using the wild yeasts from the fruit, to truly reflect our terroir, while Chad likes to experiment with winemaking yeast varieties. This is the fliptop style of bottle we should use, unless we are making a still cider. |
 |
| The gorgeous meal we were served, featuring (naturally) a Lactuca salad mix. |
 |
| We finished our meal with one last tasting: the juice we had just pressed! |
 |
| Kevin's yard is so inspiring. |
 |
| Seriously. |
 |
| Siphoning the juice into smaller bottles to take home. The chalkboard is keeping track of how many pails of pomace they've pressed this year. When Kevin measured the sugar content, it came out at 60, which will give an alcohol content of about 8% after it's fully fermented. |
 |
| Chad showing us the consistency of the 'cheese' that's left at the end of the press, after folding and re-pressing a couple of times. This cake of fruit pulp gets saved and taken to a farm to feed the pigs; you could also add it to the compost pile. |
 |
| More fruit crushing - pears this time. |
 |
| Pear pomace. |
 |
| This carboy from a previous day's press - the cloudy one with the head at the top - has started to ferment. If you let the freshly pressed juice sit, it will start to bubble just from the action of wild yeast after 3-4 days. The guys said a coolish room (like a basement or garage in the mid-teens) is ideal. |
 |
| Freshly pressed pear juice. So nice. |
 |
| My juice (in a sterilized jug with an airlock cap) before pouring some off a couple of cups for my kids to try and adding some champagne yeast. My daughter reacted as if she had never really tasted juice before. |
 |
| I dissolved about a fifth of my packet of champagne yeast in some of the juice and let it sit, covered, on the counter for a couple of hours. See the bubbles of carbon dioxide (head)? That means the yeast is alive. This got poured into my jug of juice, and then more juice was added to this cup to get the rest of the yeast into solution. |
 |
| Just before bedtime, after adding the rest of the juice-yeast mixture. See the head already starting to form? Yay! I left it at room temperature (21C) overnight. |
 |
| The same jug the next morning, before giving it a swirl. Clearly there has been a lot of activity overnight. Perhaps I was a bit heavy-handed with the yeast? |
 |
So, just for funsies, I picked up a couple of jugs of the fancy organic apple juice at the grocery store, used three cups of my jug from yesterday to inoculate that (in the bucket), then topped up my jug with the same juice. (You can see here how that ugly gunk at the top went back into suspension when I swirled the jug, too.) I'll let you know in a few weeks how this turns out!
Thanks again to Chad and Kevin and the entire Shovel & Fork team for teaching these culinary skill-sharing courses! The day was SO much fun. Even if I never make cider again myself (and I think I will!), I have a much better appreciation now for the art of choosing fruits, yeasts, and fermentation conditions to achieve particular flavours. I'll never look at a bottle of cider the same way.
Update: there are great instructions for making cider from scratch here and here! |


No comments:
Post a Comment